 This article is about the Real World |
|---|
- For the Horde mode in Gears of War 2 or Gears of War 4, see Horde and Horde 3.0.

Horde 2.0 is the redesigned Horde mode for Gears of War 3. Horde 2.0 brings in a huge amount of new material for Horde Mode, bringing in a more strategic battle in addition to the tactical battle. Horde 2.0 allows the players to set up static defenses to help them fend off 50 waves of the Locust Horde. Players may use Barriers, Turrets, Decoys, Sentries, Command Centers and even a Silverback to keep the enemies at bay. Currency is earned for each kill and for completing wave challenges, which they can use between waves to construct and maintain their defenses and buy weapons and ammunition boxes. Weapons and ammo dropped by enemies can be used as well, but disappear when the next round starts. As players get into higher waves (from every round set (1-10, 2-20,etc.), expect the profit and difficulty to rise time by time.
Unlike Horde 1.0, the foes will vary and not be constantly repetitive. In Horde 1.0 every round would repeat every ten waves. In Horde 2.0, they can have a variety of foes at wave 1, varying from Tickers to Lambent Drones. Units will start to have better weaponry and change their behavior over time, too. For example, once a player reaches wave level 5, Lambent Drones start to use Gnasher Shotguns, Lambent Drudges begin to transform after being damaged enough, making it harder for players.
Bosses, picked at random from a Brumak, Gunkers, Savage Corpsers, Lambent Berserker, Berserkers, or a Reaver squad, will make an appearance every ten rounds, depending on the "type" of enemies for those ten rounds. Support troops (ordinary enemies) will appear in addition to the boss.
The unique Medal players can get from Horde 2.0 is the "Big Money" medal, which counts all the money you've gotten from playing Horde 2.0. Getting the Onyx version of the medal will allow the player to play as Aaron Griffin in multiplayer settings if he has not been unlocked yet.
Check the Enemies section to see which enemies are new in Horde 2.0.
Setup
Wave 1 will not start until the player(s) set up a command post. There are four or more command posts per map to choose from. The players can't build fortifications anywhere they like. As soon as a command post is activated, available static sites appear in the vicinity (two exceptions: silverback and onyx guard can move). The player can only see sites he can build depending on his fortification experience progress. Four colors show the options a player has:
- Green: Fortification can be built
- Red: Insufficient money to build, fully repair, reload or rebuild
- Yellow: Fortification can be fully repaired, reloaded or rebuild
- Blue: Fortification can be upgraded (only available for fully repaired fortifications)
Just like in Versus, there are several weapon spawn points on every map, as well as ammo boxes to refill weapons. Those can be bought immediately, even before the first base has been established (Check Weapons for prices). Buyable weapons will be highlighted in green if the player is close so he can tell them apart from the dropped ones. Note that a lot of spawn points switch the appearing weapon every round, like Boomshots, Torque Bows, Hammers of Dawn, heavy weapons, pistols, and grenades.
Players must hold Y to buy weapons; the player who bought it will then pick it up replacing their previous weapon which will be dropped (Note that you can't buy or pick up weapons holding a heavy weapon). Ammo boxes refill every weapon that is not yet at maximum capacity (one grenade as well) and will not disappear if used. Players can also trade currency with each other, just like the ammo trade, by pressing B while standing near and aiming at a player (Y for ammo).
When one post is activated, the team has 30 seconds to buy fortifications and find a good position before the first wave starts.
Note: If there is a host migration, the next wave will start 30 seconds after players respawn, even if no base has been established.
Points, Money and Death
Players earn the same amount of money as of points by hurting, killing and spotting enemies. The earned money isn`t affected by the difficulty level or the chosen mutators, but points are. While points always counts for the whole team, money must be earned by every player for himself, which doesn`t really matter if you play as a team swapping money if needed. But there are ways to "waste" money and points (aside of using turrets or get fortifications damaged):
- "Assists" - mainly from explosions from dying Lambent or if Locust and Lambent forces create friendly fire; in that case, Locust and Lambent will fight each other instead.
- Enemies get downed or killed by the ink cloud of a dying Kantus.
- Enemies get killed by barriers (especially Tickers, Polyps or Formers; expect a great point loss if a bigger enemy is killed by a barrier as well, even if you dealt 99% of the overall damage).
- Enemies get killed by the Onyx Guards called by the command center (indoor maps) or built as a level 8 decoy.
- Overall points for an infantry unit are reduced if he wasn`t killed at once, but first downed and then killed (check Enemy List for details). Though impractical, downing and getting them back up twice yields more money.
Points
The team get points for every wave survived. If all team members die the counter will reset to zero. The score will be saved for every map, showing in leaderboards how well a team performed. The set difficulty and chosen mutators reduce or boost the points earned after each wave.
- Casual = 100%
- Normal = 150%
- Hardcore = 200%
- Insane = 250%
Additional points are rewarded for surviving players at the end of a wave (200 x (% of surviving players) x (unit digit of wave number); for example: if 2 of 4 players survived wave 25 they will get (200) x (0.50) x (5) = 500 points.
Money
Money is earned by hurting, killing, downing and spotting enemies as well as reviving other players and completing challenges partial or complete. The only way to lose money you already earned is by being downed. However, the money can be saved for the team if the player is revived, earns the savior the money the downed player lost: $100 for every time down, no further penalties when killed.
Everyone starts off with $1000. Upon completing a round, all players earn an extra $250 each, which is not included in earned cash. Because of that, the more players participating the more cash is in the game to buy and fortify.
Spotting an enemy is always useful. Aside from warning your team against incoming enemies, you will always get extra money if an enemy with your mark is killed, while the assisted players don`t get less points. The bigger the enemy the bigger your reward for spotting: about 17% of the overall points for the kill. If you kill the enemy all by yourself you wont get more points than usual. Remember that you can spot enemies and earn money even after death in ghost cam mode.
Instead of buying weapons, try to get used to the usage of enemy weapons. Remember that you will get some ammo for your starting weapons after each wave, as long as you don't have more than a certain amount already. That includes Lancer, Retro Lancer, Hammburst, Gnasher Shotgun, Sawed-Off and all pistols (see Weapons for details). If you want to benefit from that by switching to one of these weapons, do it before a wave ends to get the extra ammo.
Save some money for dire situations. When most members of your team die and you have to fight a boss alone or with someone else, you will be happy to have some dollars left to buy an ammo crate or two. If you have enough money, you can also respawn yourself to assist your friends.
Think about which fortification can be useful in the base area, depending on the spawn points of the enemies, the enemy types in the following wave, the behaviour of the other team members and the forifications already built. Sometimes it is useful to buy an expensive upgrade or fortification like the Silverback by combining the money of some players.
Completing a challenge is a wise investment of time with bonus cash ($2500 if completed) and other rewards. If you are unable to complete the challenge due to several reasons as soloing with the presence of Boomer units or Active Poisons are up, try to complete the challenge as best as you can. You will still be awarded a partial amount of money equal to how much you had completed for the challenge.
After completing a challenge, you are rewarded with green boxes with a $ logo on it near your Command Posts. These reward boxes do not disappear and should be opened on more difficult waves, such as boss waves. The rewards typically contain ammo, explosives, and heavy weapons such as Boomshield, Mulcher, Boomshots, etc. Once the reward boxes are opened, the weapons and ammo should be picked up because they will disappear once the next wave begins if they are not picked up/used.
Death
If you die, you are out of the round, just like in Horde 1.0. However, there is an exception in Horde 2.0 when being killed. If killed in a round, you can pay $1500 to get back into the game with your default setup (Snub Pistol, your Shotgun, your Rifle and a Smoke Grenade). The cost increases by the same amount every 10 levels have passed.
If all players die in a round, the round stops with the round failed and restarts. You can either pick to start all over again, or start back from that round you lost on. On a lost round, players who pick to restart it respawn in the map's shown spawn zones. The gained money stays with you along with weapons from fallen enemies, and fortifications are put in the condition they were in when the wave failed.
Note: If solo playing, the player will be instantly killed with no chance to get back up. If playing with 2-5 players, the player will be incapacitated instead.
Active Poisons
After each Boss Wave, the enemies you'll face become harder, gradually becoming more accurate, having more health, and dealing more damage.
- Wave 11-20: Enemies have twice as much health.
- Wave 21-30: Enemies have twice as much health and are twice as accurate.
- Wave 31-40: Enemies have twice as much health, are twice as accurate, and deal double their normal damage.
- Wave 41-50: Enemies have 2.5 times their normal health, are 2.5 times as accurate, and deal 2.5 times their normal damage.
Challenges
You will be presented with a bonus objective every 4 waves, as long as one player survives each consecutive wave. Boss waves can never have a bonus challenge. While completely optional, completing them will give you much-needed supplies such as weapons, ammo and even more cash. If you fail to complete the challenge, you receive a partial amount of the promised cash depending on how good you performed with the exception of challenges to complete the wave in X time and complete with no players dying; these are either pass or fail. If completed, the team will earn $2500. The cash will be divided by the number of players participating, so everyone gets the same amount. Onyx Guard decoys that have been built will be counted in the amount of players to split the cash between, thus resulting in human players receiving less. Two supply boxes drop the moment the challenge is complete near activated command posts. If there is only one command post, then both boxes will be dropped at that post.
Unlike dropped weapons, the supply crates will stay permanently with you, and can stack up. The rewards will disappear if the box is during the beginning of the wave after the box is opened. Example: If you open a crate just before Wave 3 begins, the contents will not disappear when Wave 3 begins, but will wait until Wave 4 begins.
List of Challenges
- Chainsaw or Bayonet Charge 6 enemies
- Complete the Wave in x time (1:20 to 4:00)
- Execute 8 enemies (Chainsaw and Bayonet charges count towards executions)
- Headshot 7 enemies (Snub Pistols can headshot, incase you do not have a weapon capable of doing so)
- Kill 7 infantry units with a turret (Silverback kills count toward this)
- Kill 10 enemies in any 30 second window
- Kill 2 Flame Boomers and/or Flame Grenadiers by detonating their fuel tank. (This comes at round 4 for "Locust" set and 8 for anything else. You will be guaranteed 2 of them in that level if they do not normally appear)
- Complete the wave without any players dying (or leaving the match).
In some challenges, the weapons needed will be provided for you. For example, the chainsaw/bayonet charging challenge will spawn one fully loaded Lancer and Retro Lancer at the Command Post.
In the 30 second window challenge, if you fail to kill enough in time, one more enemy is added to the required kill list with a specific time. Failing to kill a target before the time ends adds one more needed (so 9/10 would turn to 8/10 if you failed to kill a target in 30 seconds). Once you kill a target the timer starts going.
List of Rewards
A crate may contain one of the following:
- Instant full ammunition for the weapons the team is carrying the moment the crate is opened and one grenade if the player has less than two, sometimes up to two ammo packs.
- Two Mulchers and one Boomshield
- 5 Boomshots
- Longshot and Torque Bow
- Lancer, Retro Lancer, One Shot (always in a Wild Ticker), and a small ammo pack
- Vulcan Cannon
Mutators
- Main article: Mutators
In the game lobby, in which the host has decided what difficulty, wave, etc., there will be a mutators option below. Mutators are earned from various things from the game such as achievements and multiplayer versus tasks.The host can pick up to 3 out of 15 mutators, either making it more fun, harder, or easier for players. Mutators will have an effect on the score multiplier at the end of a wave, either subtracting or adding points depending on which mutators are used. They have no effect on money earned within waves (which is related to the points scored from a kill etc.), but will lower or increase the money put towards fortification experience depending on the modifiers used.
Notes:
- Friendly Fire also affects fortifications (turrets and silverback can be damaged by players). While enemies in Lambent waves can hurt each other, this mutator can have units of the same faction hurt each other.
- Using Pinata forces players to collect the coins to earn money and points which makes it rather hard than fun for horde. Killed enemies drop one coin per 50 points (example drone: three coins 105=50+50+5). Coins will disappear after a while.
- Big Explosions affects all explosives, such as dying Brumaks, grenades and Tickers.
- No Ammo pickups means no refill of the starting weapons and pistols after each wave and also no ammo crates available for purchase.
- Super Reload will kill most enemies in a few shots, minus Berserkers (and Lambent ones). It will also double the ammo depending on how much was left in the clip before you reloaded (so an empty clip + perfect active reload results in the active reload first, regular second)
- Infinite ammo will greatly save money as there is no need to pick up most weapons or buy ammo.
- Instagib Melee kills almost anything regardless of any damage reduction/active poison factors.
- Must Active Reload mutator should not be used unless the player can do a Perfect Reload constantly.
Investments
Fortifications
In between waves the player can see a display on the right side of the screen, showing the experience progress for each fortification type. Every Dollar spent fills the bars until level-up, which can result in new available fortifications or upgrades, less repair costs etc. Depending on the difficulty, the amount of money spent on fortications versus the amount actually used to level-up will vary.
If you cannot restore the fortification completely, the money you have left will go into it but only a certain percentage of durability will be placed on it. Fortifications you cannot build will not appear in any color until you meet the requirement to build it.
Difficulty Experience Effects:
- Casual = 60% = 0.60
- Normal = 80% = 0.80
- Hardcore = 100% = 1.00
- Insane = 110% = 1.10
Note: These can be stacked with mutators:
Fortification Experience = (Cash Spent) x (Difficulty Factor) x (1.0 + Mutator 1 + Mutator 2 + Mutator 3)
Base Establishment
$0 for the initial outpost, +$2000 for each outpost after the first.
Barriers
| Level | Fortification |
Build Cost |
Spending Requirement |
Notes |
| 1 | Caltrops | $500 / $1000 | $0 | |
| 2 | Caltrops Repair 8% Less | n/a | $2,000 | Decoy Unlocked |
| 3 | Razor Wire | $1500 / $2500 | $8,000 | |
| 4 | Razor Wire Repair 8% Less | n/a | $20,000 | Turret Unlocked |
| 5 | Electrified Barrier | $2000 / $4000 | $45,000 | |
| 6 | Electrified Barrier 8% Less | n/a | $75,000 | |
| 7 | Laser Barrier | $3000 / $5000 | $120,000 | Silverback Unlocked |
| 8 | Laser Barrier Repair 8% Less | n/a | $170,000 |
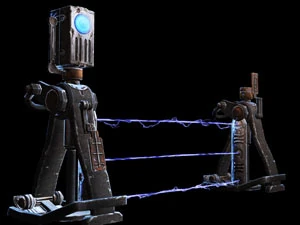
Electric wire
Enemies attempting to cross spikes or razor wire are greatly slowed and take damage, but cause a small amount of damage to the barricade. The higher the wire type, the extra benefits and more health it has before it collapses. Wires can down and kill enemies, while the barriers are more protective. If a player gets too close to them however, they will be disabled for movement, allowing the enemy to come in. Electric and Laser barriers can stun enemies. The laser barrier has a burn effect and can burn units.
Barriers are extremely effective against Maulers, as shooting the Mauler will cause it to ready its Boomshield. The Mauler will attempt to move past the barrier, but will be unable to due to the barrier. Neither the barrier nor Mauler will take damage from each other, essentially giving you an extra layer of protection. Tickers that attempt to pass a barrier will die instantly.
Decoys
| Level | Fortification | Build Cost | Spending Requirement |
Notes |
| 1 | Cole Train Thrashies Standee | $500 | Level 2 Barrier | |
| 2 | Dummy | $1000 | $5,000 | |
| 3 | Repair Cost Reduced | n/a | $20,000 | Sentry Unlocked |
| 4 | Explosive Dummy | $1500 | $35,000 | |
| 5 | Repair Cost Reduced | n/a | $75,000 | |
| 6 | Boombox Dummy | $2000 | $110,000 | |
| 7 | Repair Cost Reduced | n/a | $170,000 | |
| 8 | Onyx Guard | $5000 | $220,000 | Requires Horde Command Pack |
Decoys are a useful distraction, drawing the fire of enemies in sight. Enemies will usually attack a decoy before they will attack a player. Grenades can be tagged on them (with exclusion of the Onyx Guard of course). At level 8, the Decoy becomes an Onyx Guard bot equipped with a Gnasher Shotgun. If he gets killed, you have to start at the first level of Decoy again when you go to rebuild it. If damaged, the bot will regenerate health just like players do and can be revived.
Turrets
| Level | Fortification | Build Cost | Spending Requirement |
Notes |
| 1 | Retro Lancer Turret | $1500 | Level 4 Barrier | Holds 600 rounds of ammunition. |
| 2 | Increased Accuracy | n/a | $15,000 | |
| 3 | Lancer Turret | $2500 | $50,000 | Holds 600 rounds of ammunition. |
| 4 | Repair Cost Reduced | n/a | $90,000 | |
| 5 | Troika | $4000 | $140,000 | Holds 400 rounds of ammunition. Enemies will not be downed. |
| 6 | Repair Cost Reduced | n/a | $200,000 | |
| 7 | Armored Troika | $5000 | $270,000 | Holds 500 rounds of ammunition. Enemies will not be downed. |
| 8 | Repair Cost Reduced | n/a | $360,000 | Command Center Unlocked (Requires Horde Command Pack DLC) |

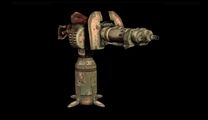
Trokia turret (third upgrade)
Turrets in Horde 2.0 have a limited supply of ammunition and can be destroyed; explosive weapons can easily demolish a turret while wildly firing will deplete its ammunition. If a turret is destroyed with a player using it, they will be incapacitated, but not killed (unless playing solo). Turrets are useful in taking out mobs of enemies quickly (such as a large amount of Formers). Turrets should not be fired wildly, as the ammo will deplete very quickly and you will burn a lot of money refilling it each round. Turrets have a rotatable base allowing the user to turn 360 degrees with it.
When interacting with a turret during the grace period, the player fills up ammo, then fixes the turret.
Sentries
| Level | Fortification | Build Cost | Spending Requirement |
Notes |
| 1 | Light Sentry | $1000 | Level 4 Decoy | |
| 2 | Light Sentry Repair 11% Less | n/a | $15,000 | |
| 3 | Heavy Sentry | $1500 | $30,000 | |
| 4 | Heavy Sentry Repair 11% Less | n/a | $90,000 | |
| 5 | Static Sentry | $3000 | $105,000 | Stuns enemies, stopping them for five seconds. |
| 6 | Static Sentry Repair 11% Less | n/a | $135,000 | |
| 7 | Incendiary Sentry | $3500 | $200,000 | Requires Horde Command Pack: Highly effective against Berserkers and Lambent Berserkers. |
Sentry turrets autonomously attack enemies that enter their field of fire. Light and heavy sentries fire bullets, but the static sentry fires a directed-energy pulse that stuns its targets. Every enemy who enters the range and sight of a sentry can be seen through walls with Tac Com, much like the leaders ability in CTL. The Incendiary Sentry shoots bolts of fire at the enemies, and is highly effective against both normal and Lambent Berserkers. The range increases with every upgrade.
Silverback Mech
| Level | Fortification | Build Cost | Spending Requirement |
Notes |
| 1 | Silverback | $12,500 | Level 7 Barriers | |
| 2 | Silverback Repair 11% Less | n/a | $200,000 | |
| 3 | Silverback Rockets | $10,000 | $500,000 | Requires Horde Command Pack |
| 4 | Silverback Repair 11% Less | n/a | $900,000 | Requires Horde Command Pack |
| 5 | Silverback Repair 11% less | n/a | $1,500,000 | Requires Horde Command Pack |
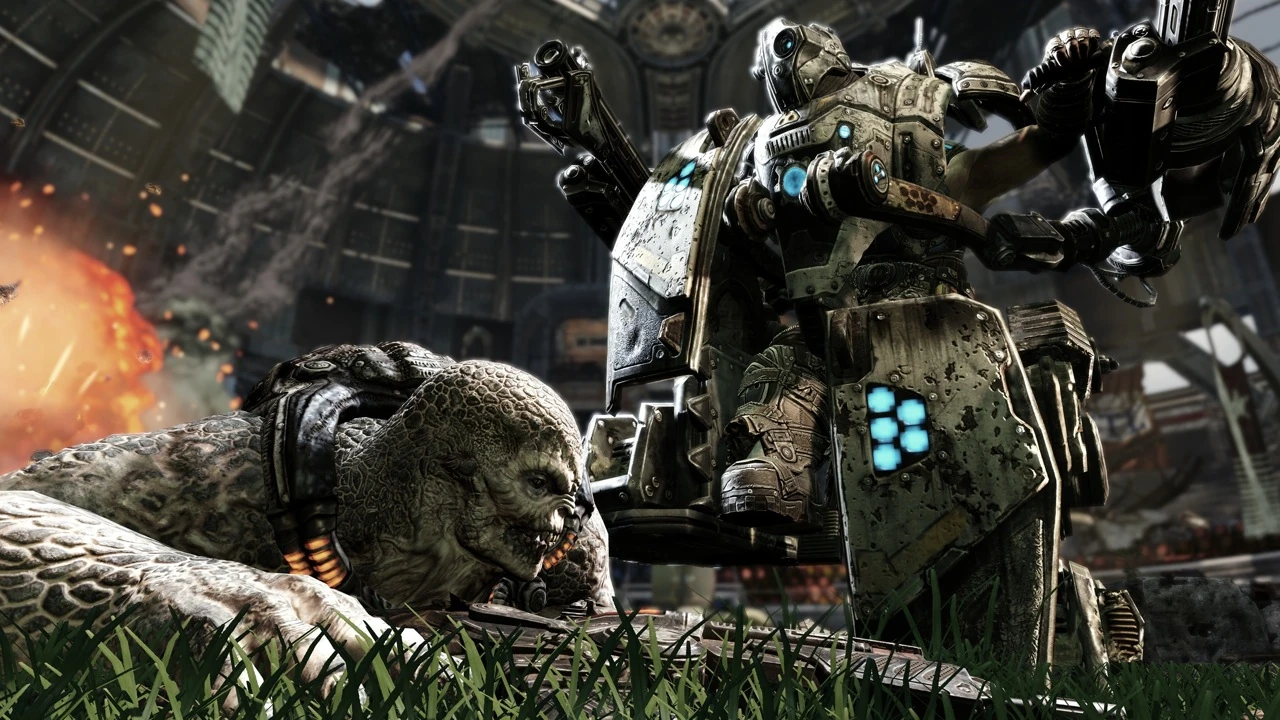

Before the title update/DLC level two Silverback would grant you 33% less repair. Due to the higher levels, this is now been split up between levels 2, 4, and 5. Each one is 11% bringing it back up to 33% at level 5. When purchased, the Silverback behaves generally like those found in the campaign. Upgrades beyond level 2 require the use of the DLC in order to shoot rockets and repair more. Just like the Campaign/Beast counterparts, players can get knocked off by any sort of stun (grenades, Corpser attacks, Wretch screams) and instantly die if it explodes. Although the static version can only shoot rockets, the player will be unable to shoot them without the level 3 upgrade.
Once a Silverback is moved, the players can see where it is on their Tac Com. There is always a Silverback in the map; you do not need to build a Command post near it to build.
Command Centers
| Level | Fortification | Fortification (indoors) | Build Cost | Spending Requirement |
Notes |
| 1 | Sniper Command Center | Boomshots | $1,000 | Level 8 Turrets | Requires Horde Command Pack |
| 2 | Mortar Command Center | Boomshots and Frags | $2,000 | $5,000 | Requires Horde Command Pack |
| 3 | Upgraded Mortars | n/a | $25,000 | Requires Horde Command Pack | |
| 4 | Hammer of Dawn Command Center | Vulcan Cannons | $3,000 | $40,000 | Requires Horde Command Pack |
The Command Center is capable of taking out several enemies at once. It disappears if triggered and must be rebuilt after each use to be used again in the next round. On indoor maps, the Command Center instead spawns a squad of Onyx Guards in an elevated, out of reach area to provide cover fire until some time has passed. It is crucial to know which areas the guards are able to reach with their weaponry to use them effectively. While the bots appear every time the center is activated on indoor maps (even if no enemy can be reached), the outdoor command center sometimes doesn`t trigger. If no enemy can be reached by the sniper squad or no enemy is under free sky to be hit by mortars or hammer strikes and the center would be wasted otherwise.
Misc
- Ammunition Box - $500 / $1000 (The increased price is for refilling completely empty weapons and or refilling a non-starter, non-pistol weapon) Ammo boxes stay throughout the whole game.
- Supply Crates - $500/$1000 - Supply crates are supply boxes that can be opened, containing random weapons, heavy weapons, as well as ammunition packs.
- Respawn (Buy back in after death) - $1500 (once per wave; increases by $1500 every tenth wave, so respawning every 10 rounds would be ($1500, $3000, $4500, $6000 and finally $7500 at round 50). Note that respawns are disabled in solo plays.
Weapons
Note that not all weapons will appear on each map. Each map has their own initial layout, and will change to the secondary layout on every odd round. It changes back to the normal layout every even round.
- Weapon: Price (full ammo/ammo when bought/refill after wave if completely emptied)
- Boltok Pistol: $300 (42/18/12)
- Gorgon Pistol: $200 (224/96/64)
- Snub Pistol: - (132/-/72)
- Mk 2 Lancer Assault Rifle: - (600/-/240)
- Hammerburst: - (380/-/220)
- Mk 1 Lancer Assault Rifle: - (330/-/150)
- Gnasher Shotgun: - (39/-/8)
- Sawed-Off Shotgun: - (6/-/3)
- Boomshield: Free (this equipment is only available in the "Overpass" map)
- Scorcher: $500 (345/180/-)
- Longshot: $700 (24/8/-)
- Boomshot: $850 (6/3/-)
- Torque Bow: $700 (12/5/-)
- Digger: $500 (6/3/-)
- Hammer of Dawn: $850
- Smoke Grenade: $100
- Frag Grenades: $500 (2 grenades)
- Ink Grenade: $250
- Incendiary Grenades: $400 (2 grenades)
- Butcher Cleaver: - (12/-/-) (can only be obtained on "Savage Horde" wave sets that include Butchers/Savage Therons)
- Mortar: $900 (3/3/-)
- Mulcher: $900 (200/200/-)
- One-Shot: $900 (3/3/-)
Enemies
- Enemy type (weapons used and dropped) - Points for being killed without downing, points when downed/points for being killed while down.
- Note: If an enemy is killed by another (e.g. a Drudge blows up a Drone), the player will receive full points. However, if some assist is used (e.g. Lambent fighting Locust, the aid of a Kantus' Ink Grenade or barriers), reduced points are given.
Infantry
- Drone (Hammerburst) - 105, 30/66
- Sniper (Longshot) - 210, 60/132
- Grenadier (Gnasher Shotgun, Boltok Pistol, Frag Grenades) - 105, 30/66
- Grenadier Elite (Gnasher Shotgun, Boltok Pistol, Frag Grenades) - 245, 70/154
- Flame Grenadier (Scorcher) - 245, 70/154 (killing him by blowing up his tank when downed makes a total of 315)
- Bolter (Boltok Pistol) - 175, 50/110
- Cyclops (Lancer) - 210, 60/132
- Savage Drone (Retro Lancer) - 175, 50/110
- Theron (Torque Bow) - 280, 80/176
- Savage Theron (Cleaver, Boltok Pistol) - 175, 50/110
- Beast Rider (Hammerburst) - 175
- Reaver Rider (Theron with Torque Bow) - 175
Humanoids
- Kantus (Gorgon Pistol, Ink Grenades) - 420
- Armored Kantus (two Gorgon Pistols) - 700
Lambent
- Lambent Drone (Hammerburst) - 105, (Gnasher Shotgun, Boltok Pistol) - 245
- Lambent Drudge (Hammerburst)/ Lambent Headsnake - 280 (Lambent Drudge)/ 420 (after mutation or killed while charging to explode)/ 175 (Lambent Headsnake)
- Lambent Wretch - 140
- Former - 140
- Polyp - 105 (17 if produced by a mutated drudge)
Beasts
- Ticker - 105
- Wild Ticker - 70
- Wretch - 70
- Shrieker - 245
- Giant Serapede - 525
- Bloodmount - 420
Boomers
- Butcher (Cleaver) - 210
- Boomer (Boomshot) - 385
- Flame Boomer (Scorcher) - 315
- Grinder (Mulcher) - 525
- Savage Boomer (Digger) - 385
- Mauler (Boomshield, Flail (not dropped)) - 525
Bosses
- Berserker - 1400
- Brumak - 2800
- Savage Corpser - 875
- Lambent Berserker - 2100
- Gunker - 700
- Reavers (has 1 Reaver Pilot and 1 Reaver Rider) - 875, 1050 (if you kill the rider first)
Strategies and Tips
Overall Gameplay
- In boss waves upon death a boss will respawn as long as enough Horde Meter is left. On easier rounds, you can simply deal with the bosses, especially if you have Super Reload, as you can kill most bosses quickly.
- Instagib Melee can also kill most bosses quickly. It does not work on Reavers, Brumaks and Lambent Berserkers however. Using this mutation should only be used if you really need to escape, since you will most likely be incapacitated or killed on the higher rounds if you attempt to instagib melee a boss like a Gunker.
- Ensure you have enough ammo to make the round; its better to have enough instead of dealing with something like a Theron without any ammo left on a boss round.
- Listen to the enemy. They always give off what they're about to do, and sometimes let off screams, which tell you what enemy is in. For example, a deep, loud roar indicates a Boomer (or other variants), have joined the fray. A deep, groaning-like sound indicates Drudges have spawned.
- In a boss round, if the Active Reload mutator is on, drain the current clip on your Lancer until it is empty, and then perfectly reload it. This will save time if the players face a Berserker or Brumak.
Enemies
Standard Units
- Keep Tickers away from the fortifications. They can deal a lot of damage to your fortifications. Tickers appear very frequently in the beginning levels, and those levels usually will not have enough money to cover the costs of any damage they deal to your fortifications. Lambent also have the same effect, but to a lesser extent.
- Smoke Grenades and incapacitated units force the Armored Kantus to open its mouth. They can also be dealt with normally but should not be attempted on higher rounds due to increased health.
- Locust and Lambent will fight each other if one side provokes the other with friendly fire.
- Grinders will instantly kill players if they get too close to their Mulchers.
- Maulers can stun players with their flail.
- On specific waves, Boltok Pistols begin to come into use against the player. Here are the rounds they are introduced in each set:
- Locust: Every second round (2, 12, 22, 32, 42) (Grenadiers)
- Lambent: Every fifth round (5, 15, 25, 35, 45) (Lambent Drones)
- Savage: Every forth round (4, 14, 24, 34, 44) (Savage Therons)
- Be aware that Bolters also use them.
- All: Every sixth round (6, 16, 26, 36, 46) (Grenadier Elites)
- On harder difficulties and higher levels, Grenadier Elites become an extremely dangerous problem, since they tend to throw their grenades often and make devastating use of their Boltok Pistols. They should be dealt with first if spotted.
- The same goes for Savage Therons revived by allies, Lambent Drones in the later levels, and Bolters.
- Bloodmounts can jump over obstacles that other infantry units can go over.
- Flame Grenadiers and Boomers can be very dangerous when a player needs to escape. Their Scorchers slow down a player and deal very heavy damage in a few seconds, and can be problematic on higher difficulties.
- If a Savage Theron loses his Cleaver (by using it up or being incapacitated and then revived), they will usually carry a Boltok Pistol.
- The last enemy in the round will always charge to the player. If it takes longer than 30 seconds to find, it is most likely stuck somewhere on the map, unable to move.
- If a Drudge mutates its head, shoot the body instead. When it dies, the player will receive $420 from the Drudge itself, and then by killing the headsnake, which gives $175, it will give a total of $595 instead.
Bosses
- Tall bosses can pass through obstacles which may not seem to fit them.
- Bosses come in these numbers:
- Berserker: 2
- Lambent Berserker: 1
- Gunker: 2
- Savage Corpser: 2
- Brumak: 1
- Reaver: 2
- Most bosses can wipe your fortifications down by simply walking on it. Be careful when placing a large number all over the map. They also tend to ignore decoys.
- Most bosses will also head straight for the team's location. This trait applies to all but Gunkers, who stay still and attack from afar. Brumaks seem to be partially glitched, as there are times where they will head straight for the team, other times they will simply stay put.
Berserkers
- When a boss round occurs, if Berserkers (including Lambent) are thrown into the level, it is best to move constantly. They always follow the team, regardless of where they are at. In addition, they instantly destroy anything they walk into, which also includes their charge and pummel attacks.
- Berserkers always come in sets of 2. Try to have a spare route in hand to escape from them quickly.
- Lambent Berserkers arrive by themselves, but should be treated as if you are dealing with two Berserkers, since they won't be killed as quickly even with the Super Reload mutation on.
- Berserkers are vulnerable to fire based weapons. Incendiary Grenades, a Scorcher or Hammer of Dawn strike will weaken their armour substantially in addition to stunning them and allow weapons to deal full damage onto it.
- While the Hammer of Dawn can deal a lot of damage, it is not recommended due to the slow startup and the fact that you will have support units all over the place if the Horde Meter is still full.
- A well-timed incendiary grenade can stun the Berserker twice instead of once.
- For Lambent Berserkers, it will open up their chest immediately.
- Berserkers (including Lambent) will roar and screech before charging straight at the player. As they are blind, they will not steer themselves at the player, so a well timed roll can save you from death.
- If playing with the Super Reload mutation, the Lancer is the best weapon to deal with Berserkers. It fires fast, has a large ammo clip and short reload time, compared to the slow fire/reload of the Hammerburst and inaccurate fire of the Retro Lancer if not burst fired. On Casual without any Active Poisons, a Berserker will fall in about 30-40 Super Reloaded Lancer bullets. It is best to start another Horde match if you encounter either variant of the Berserker if you are soloing on waves 20, 30, 40 or 50.
Brumaks
- Brumaks shoot accurate fire and chaotic homing missiles. Furthermore, the missiles can briefly stun.
- To kill the Brumak, the arms or the pack it is carrying must be attacked. The rocket launcher back is immune to damage.
- Once the Brumak's turrets are destroyed, it will constantly shoot rockets at you.
- The Brumak's health is signified with the pack on its back. As it reaches lower health, gas flames will start to leak out from it.
- A dying Brumak's explosions can be problematic if there are units leftover. The explosion engulfs the screen completely, unlike the other units and during that brief time a support unit may get in and kill the team. Try to stay near an enclosed area, preferably with a barricade of some sort along the way.
- Try to avoid killing the Brumak early, unless it is heading straight for the team. Brumaks tend to stay still, and killing one early can spawn another which may head straight for the team. Brumaks also destroy any fortifications they touch instantly like Berserkers.
- Instagib melee does not work against Brumaks. Touching their feet will also kill you instantly.
- Only two Brumaks can appear in a boss stage, due to the massive value they have on the horde meter.
Reavers
- Reavers are perhaps the most easiest of all bosses due to their ease to kill and little risk of dying. However, if left alone and dealing with support units, you can end up spawning Grenadier Elites and Therons, who are extremely dangerous to deal with on higher levels.
- Shoot the Theron off the Reaver first before killing the Reaver. The Theron has the height advantage over you and can instantly kill you on harder difficulties/higher levels. It will also provide extra money, making every Reaver kill worth $1050.
- Reavers will move towards your position rather than standing still. The Reaver will also use its cannon frequently.
- It takes half a clip of a Super Reloaded Lancer to kill a Reaver at level 50.
- When a Reaver uses its melee attack, if it misses it will be distracted for a while attempting to get the leg off. If it manages to hit, the player will get briefly stunned.
Gunkers
- Don't underestimate a Gunker's melee attack. Despite being a melee attack, the range is quite long. Even on Casual without any Active Poisons, the long range gunk can incapacitate a player in two moderate/direct hits. The same also applies with its melee attack.
- The ranged attack of the Gunker can briefly stun players. Furthermore, it is extremely accurate and problematic on higher levels. Your character should warn you of the attack, giving you ample time to dodge.
- A dying Gunker's explosion can kill multiple enemies if it is next to others.
- Gunkers tend to stay still rather than constantly moving towards the player, similar to Brumaks. If they cannot attack you with their ranged attack, this most likely means they cannot attack you with it and will move to get a better angle.
Savage Corpsers
- If the Savage Corpser hits a barrier, it will try to get through as a standard unit but then dig immediately past the defenses.
- Try to shoot the Corpser as quickly as possible. When it takes enough damage, it will burrow back down and head straight for the player, even if they go the wrong way.
- If a roll is done correctly, it is possible to avoid the three-hack attack.
- The three-hack hacking attack can briefly stun players.
- The Savage Corpser tends to do two three-hack attacks before resurfacing again.
- Silverback rockets are highly effective against Savage Corpsers.
- Savage Corpsers tend to be accompanied with Giant Serapedes.
- Stay away from a Savage Corpser if they begin to use their claws. It can stun players, force them off Silverbacks and can easily destroy fortifications.
Maps
- Always make sure that you have an escape route planned, in the event that you are overwhelmed, so you can have a second wind and wipe out the enemies before they kill you.
- Weapons will change each round, so be aware of the weapons you want in each map and when it is offered if you cycle between weapon layouts.
Checkout
- The small ceiling height of the Hanover supermarket prevents Gunkers from performing their ranged attack. They will also typically stay still, essentially making them completely harmless.
Overpass
- The team can set up a base at the top of the map. While there are no decoy spots at that base location, it forces the enemies to come up to the base, and into a funnel where they can easily be disposed of. An overpass hanging to the right can be used as a last stand area. Be aware that this location has no secondary route, so you will have to run out of the area if you get overwhelmed.
- The overpass is a great way to deal with regular Berserkers and Savage Corpsers. They can be manipulated into attacking early, failing because they are unable to reach you with their attacks. You still have to be careful for the support units though.
- If a Brumak spawns in the area with the COG symbol, most of its missiles will hit the symbol.
Sandbar
- It is possible to have a Brumak permanently stuck at the archway near the cave spawn.
Trenches
- It is possible to get a Lambent Berserker temporarily stuck in the area underneath the Mortar/Mulcher spawn.
- Like Overpass, Trenches has a great area to put enemies in a funnel spot for the team. Unlike the Overpass position, there is an escape route in the event that you need to leave, though you will need to fight your way through if the enemy makes their way up the hill. Note that enemies can come up the escape route, which can be problematic on higher difficulties/waves.
- However, you should be aware that while compared to Overpass, the funnel effect here does not work as well because of the cover and lack of distance for the enemy to reach your fortifications.
- Be aware of the sandstorm that appears occasionally on this map. Your vision will be obscured, but the enemy won't suffer the same effects. TAC/COM can help identify enemies during a sandstorm.
Money in Waves
In a specific wave, the team always earns about the same amount of cash. As mentioned above, the money may vary depending on how the enemies are killed. Thus the following list can only provide average values:
- Wave 1: ~$825
- Wave 2: ~$1600
- Wave 3: ~$2335
- Wave 4: ~$3100
- Wave 5: ~$4000
- Wave 6: ~$4700
- Wave 7: ~$5500
- Wave 8: ~$6300
- Wave 9: ~$7200
- Wave 10: ~$7800
In the following 10 waves, the cash rises by about $775 per wave (for example wave 11: $825 + $775 = $1600, wave 12: $1600 + $775 = $2375) and so on (wave 21: $1600 + $775 = $2375, wave 22: $2375 + $775 = $3150 etc.).
Enemies in Waves
Regarding the "fixed" amount of money in every wave, the game chooses enemies it can be earned from, depending on the wave type and thus available enemy types. Enemy types exclusive to a wave type have the same colour as the corresponding wave type.
| Wave | Locust Waves | Lambent Waves | Savage Waves |
|---|---|---|---|
| 1 | Ticker, Drone, Wretch | Ticker, Drone, Lambent Drone, Polyp | Ticker, Drone |
| 2 | Ticker, Drone, Sniper, Grenadier, Wretch | Ticker, Drone, Sniper, Lambent Drone, Polyp | Ticker, Drone, Sniper, Wild Ticker, Butcher |
| 3 | Ticker, Drone, Sniper, Grenadier, Wretch, Flame Boomer | Ticker, Drone, Sniper, Lambent Drone, Drudge, Polyp, Lambent Wretch | Ticker, Drone, Sniper, Wild Ticker, Butcher |
| 4 | Ticker, Drone, Sniper, Grenadier, Boomer, Flame Boomer, Wretch, Shrieker | Ticker, Drone, Sniper, Lambent Drone, Drudge, Lambent Wretch, Former, Boomer | Ticker, Drone, Sniper, Boomer, Butcher, Savage Drone |
| 5 | Ticker, Drone, Sniper, Grenadier, Boomer, Flame Boomer, Kantus, Shrieker | Ticker, Drone, Lambent Drone, Drudge, Boomer, Grenadier Elite, Kantus, Lambent Wretch, Former | Ticker, Drone, Savage Drone, Wild Ticker, Boomer, Kantus |
| 6 | Ticker, Drone, Grenadier Elite, Flame Grenadier, Cyclops, Kantus, Shrieker | Ticker, Drone, Lambent Drone, Drudge, Grenadier Elite, Flame Grenadier, Boomer, Kantus, Former | Ticker, Drone, Grenadier Elite, Flame Grenadier, Bolter, Savage Drone, Savage Theron, Boomer, Kantus |
| 7 | Ticker, Drone, Grenadier Elite, Boomer, Grinder, Cyclops, Kantus, Theron, Shrieker | Ticker, Drone, Lambent Drone, Grenadier Elite, Flame Grenadier, Drudge, Lambent Wretch, Boomer, Grinder, Theron | Ticker, Drone, Grenadier Elite, Flame Grenadier, Savage Theron, Savage Drone, Boomer, Grinder, Bolter, Kantus |
| 8 | Ticker, Drone, Grenadier Elite, Boomer, Grinder, Mauler, Cyclops, Theron, Armored Kantus | Ticker, Drone, Lambent Drone, Drudge, Grenadier Elite, Boomer, Grinder, Mauler, Kantus, Theron | Ticker, Drone, Grenadier Elite, Flame Grenadier, Boomer, Grinder, Mauler, Kantus |
| 9 | Ticker, Grenadier Elite, Flame Grenadier, Kantus, Cyclops, Shrieker, Boomer, Grinder, Mauler, Theron, Bloodmount, Armored Kantus | Ticker, Grenadier Elite, Flame Grenadier, Lambent Drone, Drudge, Boomer, Grinder, Mauler, Theron, Kantus | Ticker, Grenadier Elite, Flame Grenadier, Bolter, Boomer, Grinder, Mauler, Savage Drone, Savage Boomer, Theron, Kantus, Giant Serapede |
| 10 | Grenadier Elite, Flame Grenadier, Boomer, Grinder, Mauler, Theron, Bloodmount, Armored Kantus, Shrieker | Ticker, Lambent Drone, Grenadier Elite, Flame Grenadier, Drudge, Boomer, Grinder, Mauler, Theron, Kantus | Ticker, Grenadier Elite, Flame Grenadier, Boomer, Grinder, Mauler, Theron, Savage Boomer, Giant Serapede |
| Boss | Reaver | Gunker, Lambent Berserker | Savage Corpser |
| Brumak | |||
| Berserker | |||
Notes:
- The game may shift to a different wave type if a wave fails or there happens to be a host migration.
- Note that Corpsers are typically accompanied by a Giant Serapede
- Flame Grenadiers and Flame Boomers that appear because of the challenge (killing 2 by blowing off their tanks) are not included.
- A smoke grenade will set off to disguise large groups spawning, such as Tickers, Polyps or Formers. It can also set off to give off a large, varied pack of enemies (an example would be a Kantus, some Grinders/Maulers and Therons)
- Drudges will start to mutate on wave 5 (15, 25, etc.).
- Formers rush usually in groups of 8
Trivia
- Bosses and enemies are completely randomized. However, each specific enemy has a certain percentage chance of appearing. Certain enemies have a high chance of appearing, such as infantry units, while other enemies have a rare chance of appearing, such as Formers, Serapedes, Wretches and Bloodmounts.
- If over $500 is earned from a kill, such as killing a Grinder, the player will hear a "Cha-Ching" sound.
- Like multiplayer modes, players can use weapons to unlock their special execution. This also counts for the Command Center kills.
- Horde 2.0 is currently the only way to unlock the Cleaver's special execution as it does not appear on any other mode, apart from Campaign, however, the execution is already available and kills there will not count towards the execution.
- If a player is downed, the enemy doesn`t finish him off at once. It takes about 10 seconds until an enemy capable of performing an execution moves in for the kill. The same behavior can be seen if an enemy is downed and revived by an infantry unit. It varies on the difficulty you are playing: when playing on insane, the enemies rush desperately to the kill, it might take 2 to 5 seconds.
- Keep in mind that a Kantus can revive a downed infantry unit as soon as he hits the floor, ignoring the grace period. The enemy can be downed again immediately if fired on.
- The player instantly dies if playing by themselves.
- Strangely enough, despite the decoy being built, if a player playing as a COG Gear builds/rebuilds one, he will question its purpose.
- Savage Grenadiers do not appear in the savage set despite being related to them. This is odd considering that they appear in both Campaign and Beast Modes. However, this may be for the sake of simplicity, since Grenadier Elites already appear starting from wave 6.
- The stat pages for Horde call the Theron a Theron Guard.